In this chapter, you’re going to learn about packages and how to install them plus virtual coding environments that keep your packages isolated and your projects reproducible.
Packages
Introduction
Packages (also called libraries) are key to extending the functionality of Python. It won’t be long before you’ll need to install some. There are packages for geoscience, for building websites, for analysing genetic data, for economics—pretty much for anything you can think of. Packages are typically not written by the core maintainers of the Python language but by enthusiasts, firms, researchers, academics, all sorts! Because anyone can write packages, they vary widely in their quality and usefulness. There are some that you’ll be seeing them again and again.
The three Python packages numpy, pandas, and maplotlib, which respectively provide numerical, data analysis, and plotting functionality, are ubiquitous. So many scripts begin by importing all three of them, as in the tweet above!
There are typically two steps to using a new Python package:
install the package on the command line (aka the terminal), eg using uv add pandas
import the package into your Python session, eg using import pandas as pd
When you issue an install command for a specific package, it is automatically downloaded from the internet and installed in the appropriate place on your computer. To install extra Python packages, you issue install commands to a text-based window called the “terminal”.
The Command Line in Brief
The terminal or command line or sometimes the command prompt was labelled 4 in the screenshot of Visual Studio Code from the chapter on First Steps. The terminal is a text-based way to issue all kinds of commands to your computer (not just Python commands) and knowing a little bit about it is really useful for coding (and more) because managing packages, environments (which we haven’t yet discussed), and version control (ditto) can all be done via the terminal. We’ll come to these in due course in the chapter on The Command Line, but for now, a little background on what the terminal is and what it does.
Note
To open up the command line within Visual Studio Code, use the ⌃ + ` keyboard shortcut (Mac) or ctrl + ` (Windows/Linux), or click “View > Terminal”.
If you want to open up the command line independently of Visual Studio Code, search for “Terminal” on Mac and Linux, and “Powershell” on Windows.
Firstly, everything you can do by clicking on icons to launch programmes on your computer, you can also do via the terminal, also known as the command line. For many programmes, a lot of their functionality can be accessed using the command line, and other programmes only have a command line interface (CLI), including some that are used for data science.
Tip
The command line interacts with your operating system and is used to create, activate, or change Python installations.
Use Visual Studio Code to open a terminal window by clicking Terminal -> New Terminal on the list of commands at the very top of the window. If you have installed uv on your computer, your terminal should look something like this as your ‘command prompt’:
your-username@your-computer current-directory %
on Mac, and the same but with ‘%’ replaced by ‘$’ on linux, and (using Powershell)
PS C:\Windows\System32>
on Windows.
You can check that uv has successfully installed Python in your current project’s folder by running
uv run python --version
For now, to at least try out the command line, let’s use something that works across all three of the major operating systems. Type uv run python on the command prompt that came up in your new terminal window. You should see information about your installation of Python appear, including the version, followed by a Python prompt that looks like >>>. This is a kind of interactive Python session, in the terminal. It’s much less rich than the one available in Visual Studio Code (it can’t run scripts line-by-line, for example) but you can try print('Hello World!') and it will run, printing your message. To exit the terminal-based Python session, type exit() to go back to the regular command line.
Installing Packages
To install extra Python packages, the default and easiest way is to use uv add **packagename**. There are over 330,000 Python packages on PyPI (the Python Package Index)! You can see what packages you have installed already by running uv pip list into the command line.
uv add ... will install packages into the special Python environment in your current folder (it sits in a subdirectory called “.venv” which will be hidden by default on most systems.) It’s really helpful and good practice to have one Python environment per project, and uv does this automatically for you.
Exercise
Try installing the matplotlib, pandas, statsmodels, and skimpy packages using uv add.
Using Packages
Once you have installed a package, you need to be able to use it! This is usually done via an import statement at the top of your script or Jupyter Notebook. For example, to bring in pandas, it’s
import pandas as pd
Why does Python do this? The idea of not just loading every package is to provide clarity over what function is being called from what package. It’s also not necessary to load every package for every piece of analysis, and you often actually want to know what the minimum set of packages is to reproduce an analysis. Making the package imports explicit helps with all of that.
You may also wonder why one doesn’t just use import pandas as pandas. There’s actually nothing stopping you doing this except i) it’s convenient to have a shorter name and ii) there does tend to be a convention around imports, ie pd for pandas and np for numpy, and your code will be clearer to yourself and others if you follow the conventions.
Virtual Code Environments
Virtual code environments allow you to isolate all of the packages that you’re using to do analysis for one project from the set of packages you might need for a different project. They’re an important part of creating a reproducible analytical pipeline but a key benefit is that others can reproduce the environment you used and it’s best practice to have an isolated environment per project.
To be more concrete, let’s say you’re using Python 3.9, statsmodels, and pandas for one project, project A. And, for project B, you need to use Python 3.10 with numpy and scikit-learn. Even with the same version of Python, best practice would be to have two separate virtual Python environments: environment A, with everything needed for project A, and environment B, with everything needed for project B. For the case where you’re using different versions of Python, this isn’t just best practice, it’s essential.
Many programming languages now come with an option to install packages and a version of the language in isolated environments. In Python, there are multiple tools for managing different environments. And, of those, the easiest to work with is probably uv.
You can see all of the packages in the environment created in your current folder by running uv pip list on the command line. Here’s an example of looking at the installed packages within this very book, filtering them just to the ones beginning with “s”.
uv run pip list | grep ^s
The pyproject.toml file in Python Environments
You may have noticed that a file called pyproject.toml has been created.
{"project": {"name": "python4ds",
"version": "1.0.5",
"description": "The online book that teaches you how to use Python for data science.",
"readme": "README.md",
"requires-python": ">=3.12.0,<3.13",
"dependencies": ["beautifulsoup4>=4.12.3",
"graphviz>=0.20.3",
"ibis-framework[sqlite]>=9.5.0",
"ipykernel>=6.29.5",
"jupyter>=1.1.1",
"jupyterlab>=4.3.4",
"lets-plot==4.5.2",
"nbclient>=0.10.2",
"nbformat>=5.0",
"nbstripout>=0.8.1",
"numpy>=2.2.1",
"openpyxl>=3.1.5",
"palmerpenguins>=0.1.4",
"pandas>=2.2.3",
"pandas-datareader>=0.10.0",
"pandas-profiling>=3.2.0",
"pandasdmx>=1.10.0",
"pip>=24.3.1",
"polars>=1.19.0",
"pre-commit>=4.0.1",
"pytest>=8.3.4",
"pyyaml>=6.0.2",
"rich>=13.9.4",
"scipy>=1.15.0",
"skimpy>=0.0.17",
"sqlalchemy>=1.4.39",
"sqlmodel>=0.0.22",
"statsmodels>=0.14.4",
"toml>=0.10.2",
"watermark>=2.5.0",
"wbgapi>=1.0.14",
"yfinance>=1.2.1"]},
"tool": {"ruff": {"lint": {"ignore": ["F405",
"F403"]}}}}
This lists all of the dependencies, and the version, of a uv Python project. There are lots of benefits to tracking what versions of packages you’re using like this. One of the most important is that you can share projects with other people, and they can install them from these files too.
As you install or remove packages, the pyproject.toml file changes in lockstep.
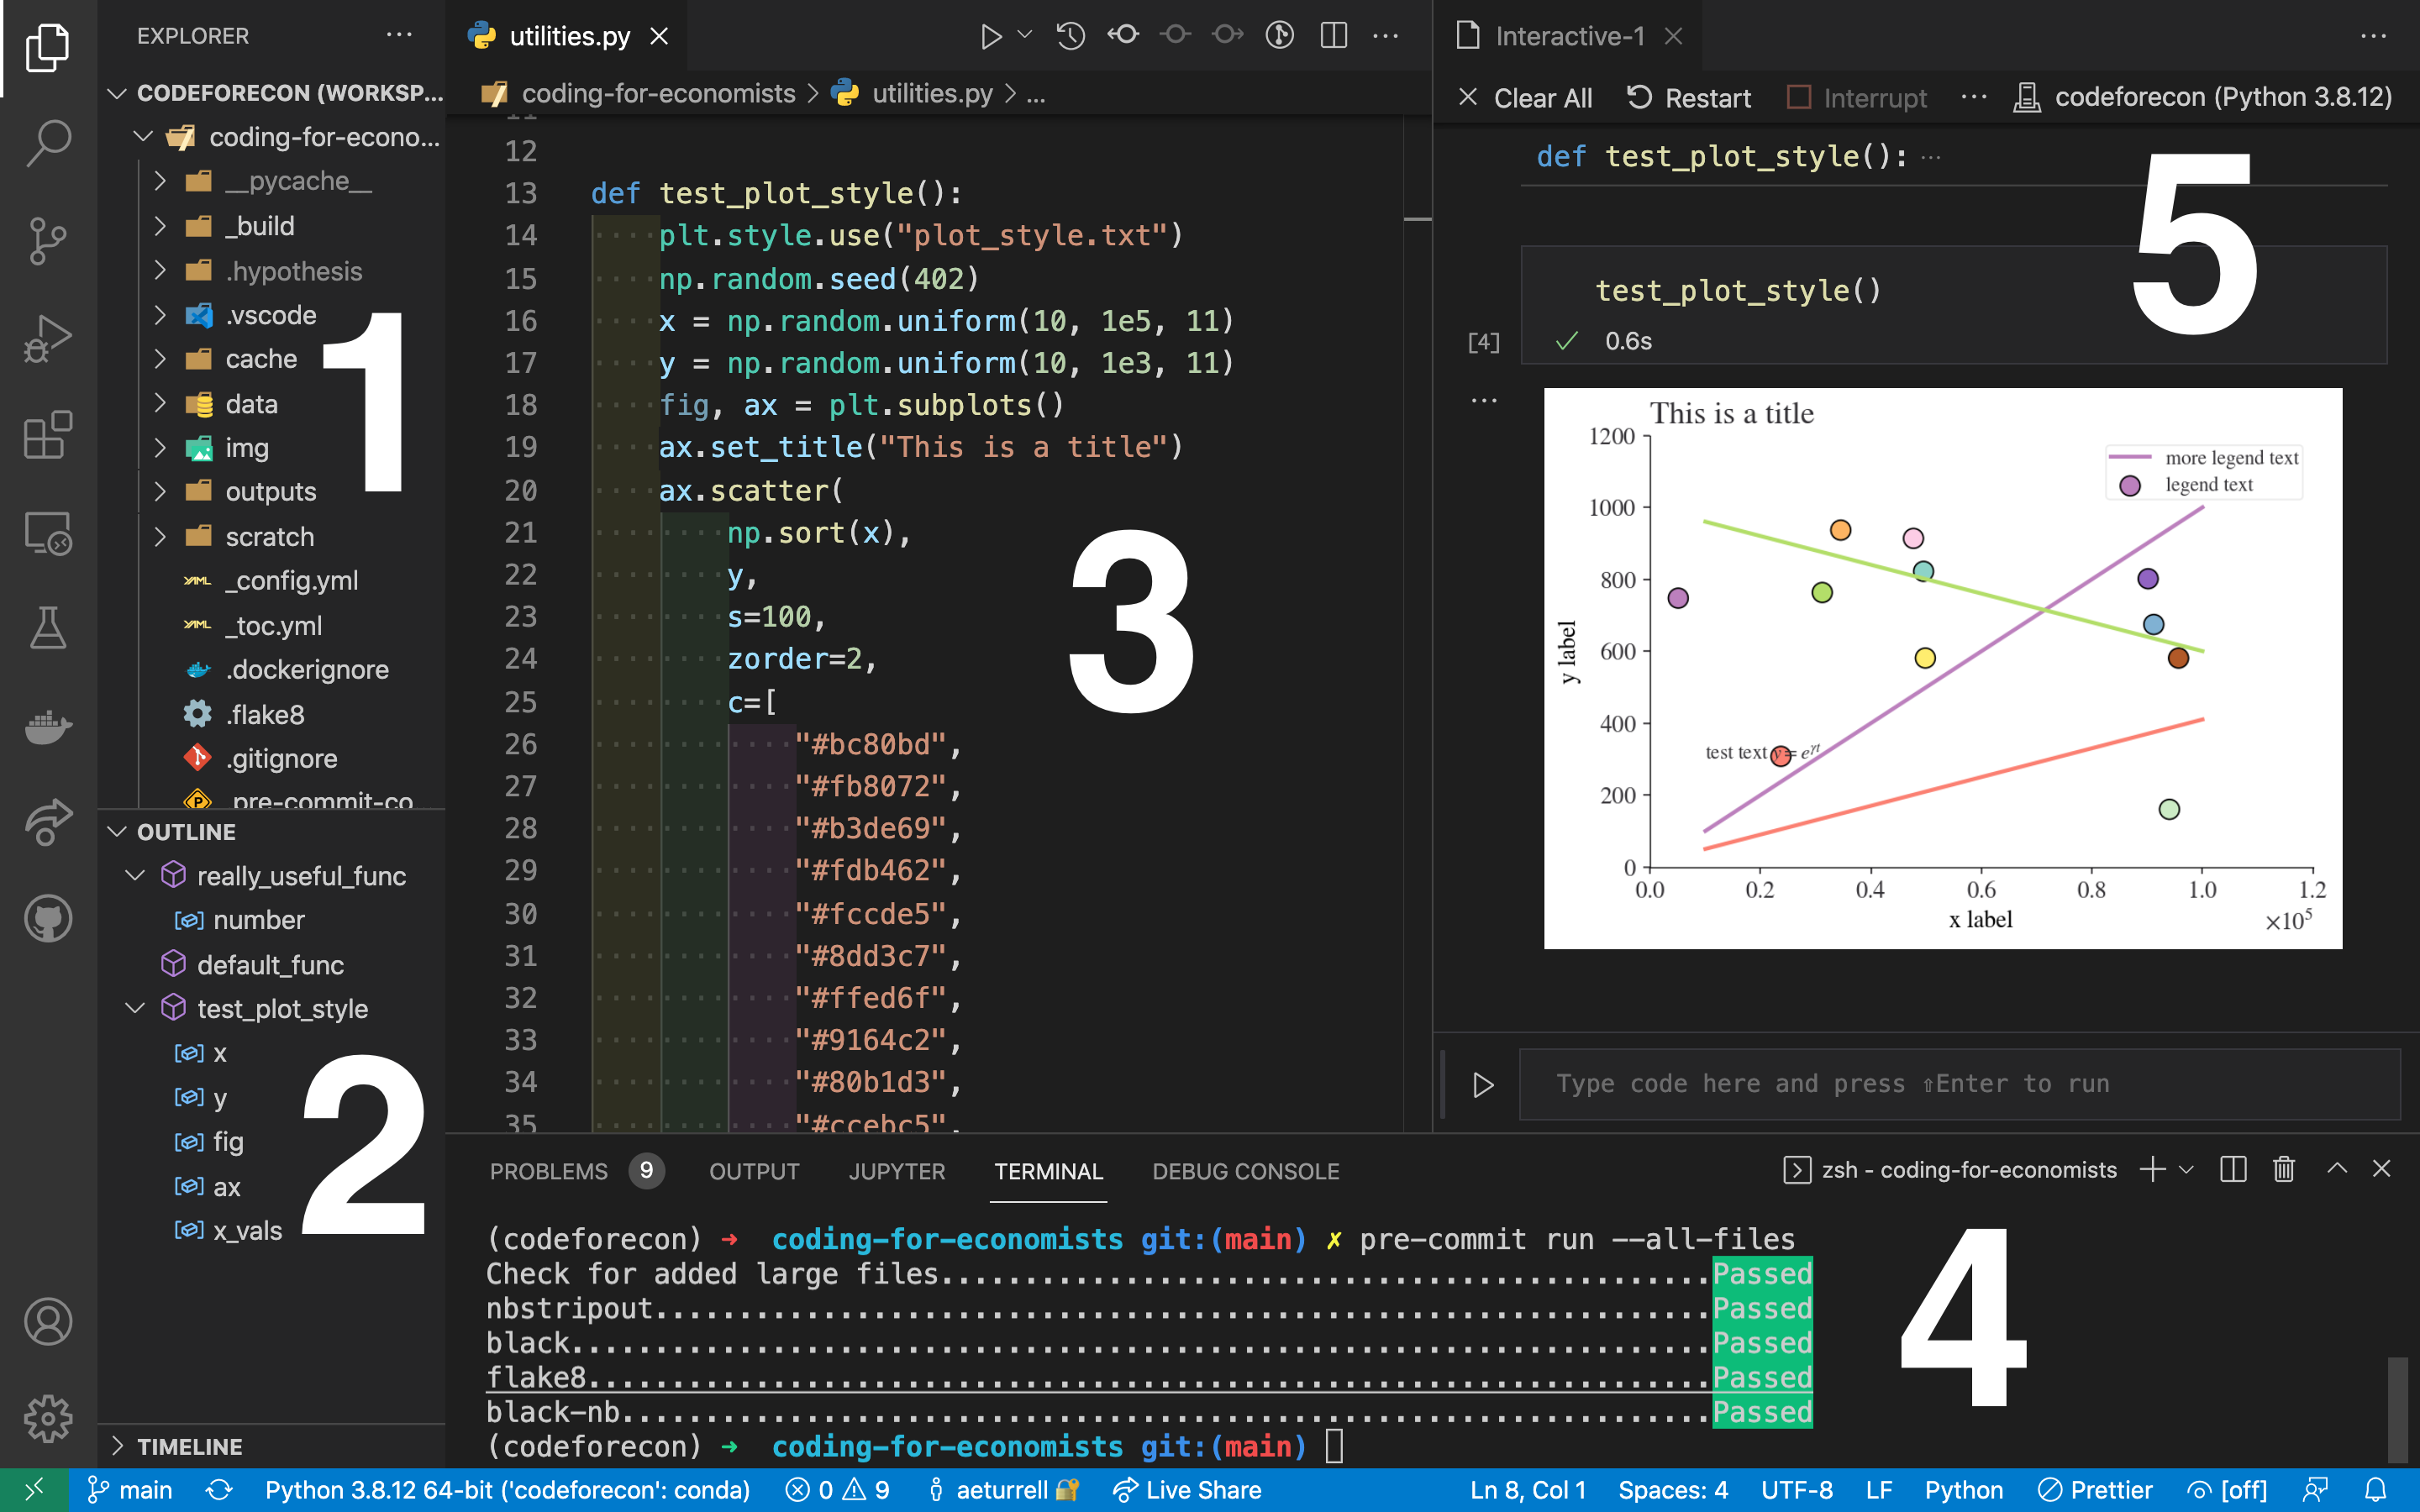
Noe that Visual Studio Code shows which Python environment you are using when you open a Python script or Jupyter Notebook.
A typical user view in Visual Studio Code
In the screenshot above, you can see the project-environment in two places: on the blue bar at the bottom of the screen, and (in 5), at the top right hand side of the interactive window. A similar top right indicator is present when you have a Jupyter Notebook open too.