In this chapter, you’re going to learn about virtual coding environments. These allow you to isolate all of the packages that you’re using to do analysis for one project from the set of packages you might need for a different project. They’re an important part of creating a reproducible analytical pipeline (more on that in Reproducible Analysis but a key benefit is that others can reproduce the environment you used) and it’s best practice to have an isolated environment per project.
If you’re going through this book using uv, you are already using virtual environments even though you may not have realised it! uv creates a different Python installation (with its attendant packages) for each project folder you use.
It may be easier to illustrate what separate environments are for with an example. Let’s say you’re using Python 3.8, statsmodels, and pandas for one project, project A. And, for project B, you’re using Python 3.9 with numpy and scikit-learn. Even with the same version of Python, best practice would be to have two separate virtual Python environments: environment A, with everything needed for project A, and environment B, with everything needed for project B. For the case where you’re using different versions of Python, this isn’t just best practice, it’s essential.
In Python, there are multiple tools for managing different environments. Of those, the easiest to work with is uv as it handles Python, packages, and reproducibility. However, if you’re using complex packages such as pymc you may prefer to use Miniconda (conda for short) instead as this offers pre-compiled code.
If you’re just getting going with coding, this book recommends that you use uv.
Using uv to Manage Environments
uv automatically creates a virtual environment per project folder so that each project you do gets its own distinct and independent Python installation. As well as providing virtual environments by default, it can:
create virtual environments on a per project basis
manage Python package dependencies, and logs them automatically
manage Python package versions, and logs them automatically
manager Python versions (ie the language itself)
install all needed dependencies and packages from previously auto-generated (by uv) lists of versions
(advanced) build Python packages
(advanced) upload Python packages to PyPI where they can be installed (ie make your project pip installable by anyone in the world)
The environment that uv creates is tied to your project folder. After navigating to your project folder on the command line (more on the command line in The Command Line), use
uv init
This will create a (human-readable) pyproject.toml file that lists the packages needed for your project. It will also create a virtual Python environment just for your project.
To add and install packages, the command is uv add package-name. As you add packages, you will see that the pyproject.toml file automatically becomes populated with what you installed. Here’s an excerpt of a typical pyproject.toml file designed for reproducibility:
The first line here says that this runs on any Python version greater than 3.9. The rest sets out the main dependencies, or packages directly needed for the project, and their minimum versions.
A second file, uv.lock, is also created. This “locks” down the dependencies of your packages. It’s also human-readable, just not very compelling. Visual Studio Code will happily open both types of file. In that file is a list of every package directly used, the version that’s installed, and the dependencies of that package and what versions of those is installed.
Using uv Environments
To use the virtual environment to run scripts or tools installed using uv add, you will need to use uv run command-name rather than the usual command-name. For example, if you have a script analysis.py, you would call it with uv run python analysis.py.
Visual Studio Code makes this easier though: just as with conda environments, you can set your interactive window or jupyter notebooks to execute with a specific uv environment. uv environments are by default found in your project folder under the .venv directory.
uv is especially strong for reproducibility. Imagine you wish to have a co-author or colleague install everything they need for the project. If you send them the automatically generated pyproject.toml and uv.lock files then all they need is to run uv sync --frozen. This will install all of (exactly the same) packages needed to run the code!
If you’re using Miniconda for Python, you manage and change environments on the command line (more on the command line in The Command Line) too. Before following these instructions, check that you have Miniconda installed and activated. You should see something like (base) username@computername:~$ on the command line (base is the default conda environment).
To create a new environment called “myenv” with a specific version of Python (but no extra packages installed), it’s
conda create -n myenv python=3.8
where you can of course specify other versions of Python by changing the number. To throw in a package or two, just add them to the end, for example
conda create -n myenv python=3.8 pandas jupyter
You can see a list of the currently installed environments by running
conda env list
Running conda list within an environment will list the packages you’ve installed within that environment.
When you install Miniconda, you will begin with a “base” environment. It’s a good idea not to use this for projects but to instead to create a new environment for each project.
There are two downsides to installing environments directly from the command line. One is that you may have lots of packages. The second is that you may wish to keep a record of the environment you created. For both of these reasons, you can specify a conda environment using a file.
The environment is given by name, the channel (where to look for the packages) by channels, the specific packages by dependencies. Not all packages are available on conda’s channels, so sometimes extra ones are needed. And some packages are only available on pip; these can be specified with a sub-section of the file like so for the skimpy package:
This goes into a file called environment.yml, which can be installed by running
conda env create -f environment.yml
This book is put together using dependencies specified in pyproject.toml and managed by uv. It’s an unusually big set because there are a lot of packages, some of them with complex dependencies, featured in the book! Here they are:
Code
from rich importprintwithopen("pyproject.toml", 'r') as stream: data_loaded = stream.read()print(data_loaded)
name = "CodingforEconomists"
version = "1.0.7"
description = "A guide for economists on what programming is, why it's useful, and how to do it."
authors = [{name="Arthur Turrell", email="None@none.com"}]
readme = "README.md"
requires-python = ">=3.10,<3.11"dependencies = ["altair>=6.0.0","bambi>=0.15.0","binsreg>=2.1.7","cerberus>=1.3.8","colorcet>=3.1.0","dayplot>=0.5.1","feature-engine>=1.9.4","geopandas>=1.1.3","geoplot>=0.5.1","graphviz>=0.21","great-tables>=0.21.0","ibis-framework>=12.0.0","joypy>=0.2.6","jupyter>=1.1.1","lets-plot>=4.9.0","loguru>=0.7.3","matplotlib>=3.10.8","matplotlib-scalebar>=0.9.0","matplotlib-venn>=1.1.2","nbstripout>=0.9.1","nltk>=3.9.4","numpy>=2.2.6","openpyxl>=3.1.5","osmnx>=2.0.7","palmerpenguins>=0.1.6","pandas>=2.3.3","pandas-datareader>=0.10.0","pandasdmx>=1.10.0","pandera>=0.30.1","pingouin>=0.6.1","plotly>=6.7.0","plotnine>=0.15.3","polars>=1.39.3","pre-commit>=4.5.1","pyarrow>=23.0.1","pyinstrument>=5.1.2","pymc>=5.25.1","pytest>=9.0.3","python-dotenv>=1.2.2","python-slugify>=8.0.4","pywaffle>=1.1.1","rich>=14.3.3","ruff>=0.15.10","ruptures>=1.1.10","scikit-learn>=1.7.2","scipy>=1.15.3","seaborn>=0.13.2","skimpy>=0.0.20","spacy>=3.8.11","specification-curve>=0.3.9","sqlmodel>=0.0.30","stargazer>=0.0.7","statsmodels>=0.14.6","sympy>=1.14.0","textstat>=0.7.13","toml>=0.10.2","umap-learn>=0.5.12","waterfallcharts>=3.8","wordcloud>=1.9.6","workalendar>=17.0.0","pyfixest>=0.50.1","yfinance>=1.2.1","arch>=8.0.0","pip>=26.0.1","folium>=0.20.0","ipykernel>=7.2.0","wbgapi>=1.0.14",
]
ignore = ["F405", "F403", "E731", "F811"]
Of course, you can install packages as you go too, you don’t have to specify them when you create the environment. With the relevant environment activated, use conda install packagename to do this. However, for any project not involving complex packages like pymc, we recommend using uv instead.
Finally, to remove an environment, it’s
conda remove --name myenv --all
Using and Switching Between Conda Environments
To switch between conda environments on the command line, for example from the base environment to an environment called “myenv”, use
conda activate myenv
on the command line. However, this only switches the environment if you plan to run code on the command line!
Fortunately, Visual Studio Code has you covered and makes it very easy to switch Python environments for a project at the click of a button.
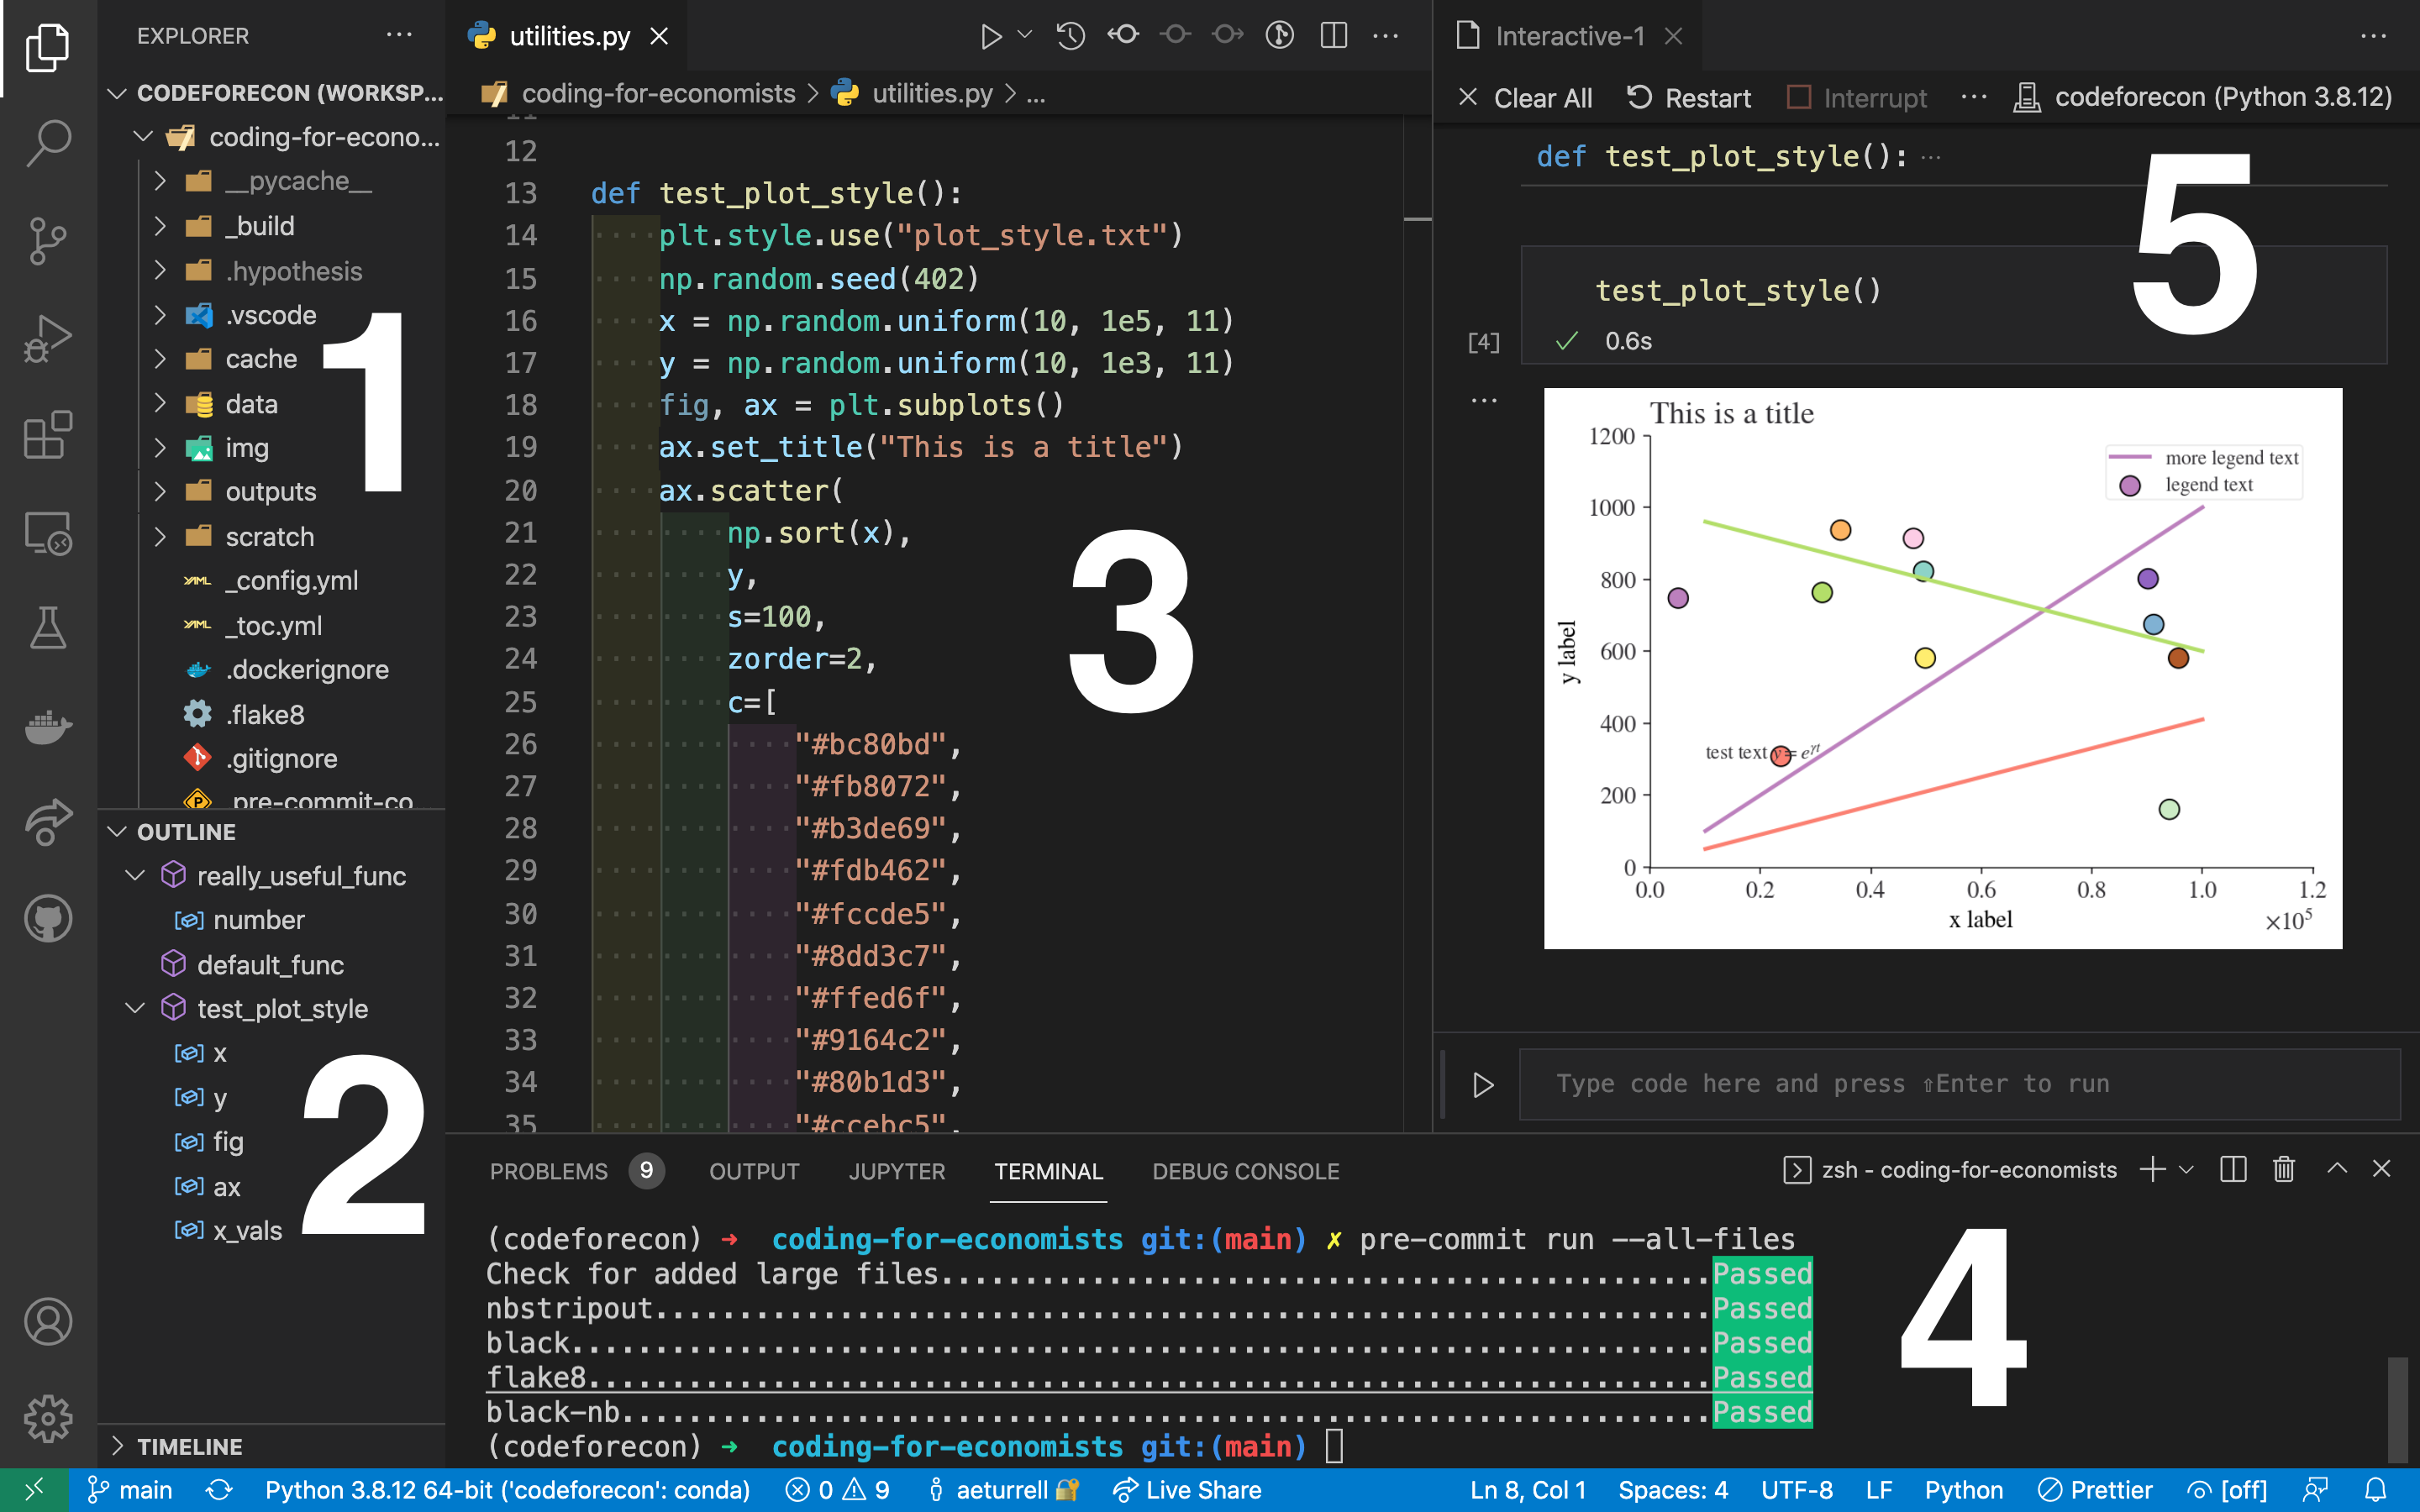
A typical user view in Visual Studio Code
In the screenshot above, you can see the project-environment in two places: on the blue bar at the bottom of the screen, and (in 5), at the top right hand side of the interactive window. Click on either to change the Python environment that will be used to execute code. A similar top right selector is present for Jupyter Notebooks too.